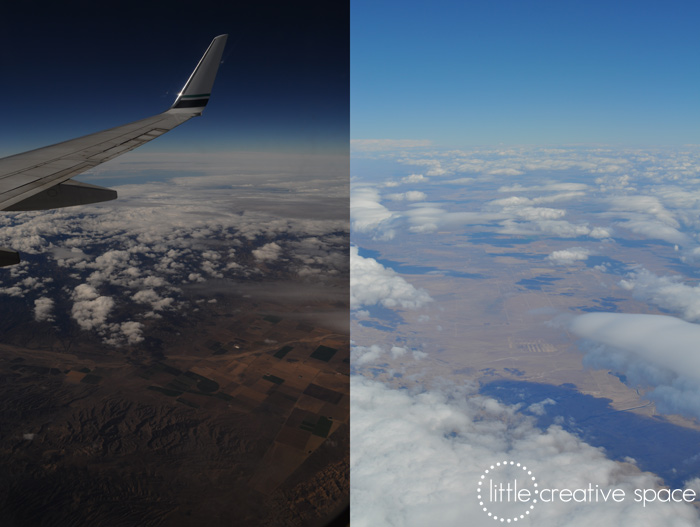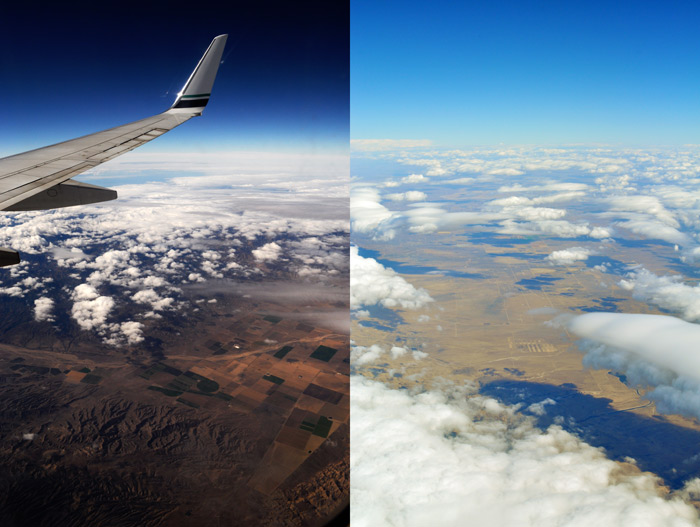
So I said before that I just about had a panic attack mid flight while traveling down to my sister’s wedding. It wasn’t because anything broke or there was anything wrong with the flight. It was because I didn’t pay attention to my camera and what setting it was on before I started shooting.
Normally I don’t really pay attention to the settings since I usually just keep it on Auto and let it do its thing. The one thing that I have learned from this trip is to not take it for granted that your camera is on the right setting.
I don’t normally look at my screen and review my pictures until much later, I’m usually too excited taking pictures to even check if they have come out alright. Part way through the flight I started to review my pictures and couldn’t figure out why the pictures were so dark. I finally looked at my little setting wheel and found I had it on “Scene”.
Uh oh.
“Scene” could mean any of the 13 different pre-made settings were being used. After a few deep breaths I looked and saw that it was on the Low Key setting. The low key setting made everything darker, more contrasty, and showed a lot more details in the clouds than the regular auto setting.

Ultimately I think the Low Key pictures turned out better than the ones shot on Auto. I really like how the picture has a lot more depth with the shadows and it was a lot easier to edit. The Auto pictures had a LOT of blue in them, which was really hard to tone down with editing. The pictures on Auto also had a lot less depth to them, the shadows within the clouds really didn’t show as much and would probably take a lot longer to bring out in Photoshop.
Ultimately I would probably use this setting, or at least consider it, the next time I am taking pictures out of an airplane window.
